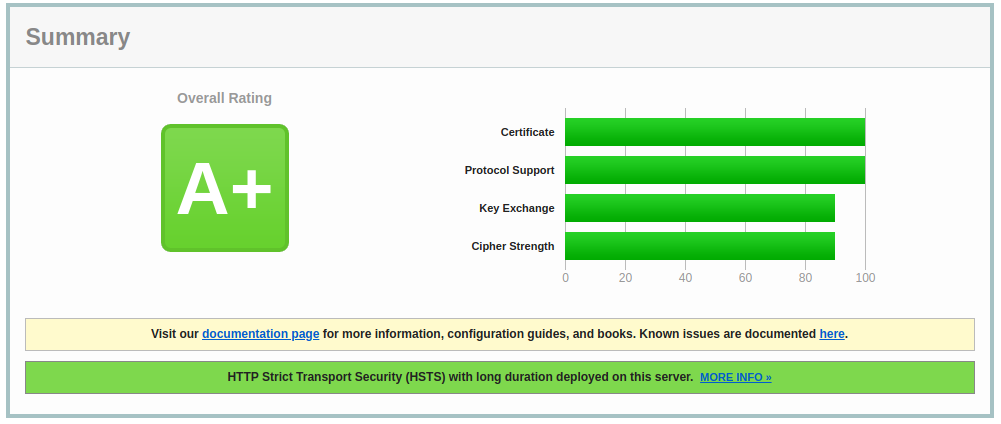
Having just setup this blog I though I would cover the SSL setup with NGINX. Chrome, Firefox and other browsers are now marking plain text HTTP sites as "insecure" so having SSL enabled on a site is becoming important, tie this together with LetsEncrypt free SSL and it should become part of a standard webserver build these days.
Getting an A Ranking
First off you will need to install LetsEncrypt using your distributions package manager ( apt-get , yum , dnf , pac man etc )
Once Installed you will need to ensure that the DNS for your site is correct and replicated.
Now we will need to use certbot to request the certificates
# sudo certbot --nginx certonly -d mydomain.com
Saving debug log to /var/log/letsencrypt/letsencrypt.log
Plugins selected: Authenticator nginx, Installer nginx
Obtaining a new certificate
Performing the following challenges:
    http-01 challenge for mydomain.com
    Waiting for verification...
    Cleaning up challenges

IMPORTANT NOTES:
     Congratulations!
Your certificate and chain have been saved at: /etc/letsencrypt/live/mydomain.com/fullchain.pem

Your key file has been saved at:
/etc/letsencrypt/live/mydomain.com/privkey.pem

Your cert will expire on 2019-02-27. To obtain a new or tweaked version of this certificate in the future, simply run certbot again. To non-interactively renew all of your certificates, run "certbot renew"

     If you like Certbot, please consider supporting our work by: Donating to ISRG / Let's Encrypt:   https://letsencrypt.org/donate Donating to EFF: https://eff.org/donate-le
Now we will need to configure your site to listen on 443, for this example I am using NGINX as a proxy for Ghost. Note the ssl_protocols line, this is what gets you the "A" ranking as we have disabled old TLS 1.0 & TLS 1.1 protocols by removing them from this line. Disabling TLS 1.0 & 1.1 may result in users who are on older devices being unable to access your website, so please bare in mind your audience when disabling these legacy security mechanisms.
server {
	listen 443;
	server_name mydomain.com;
	root /var/www/ghost/system/nginx-root;


    ssl on;
    ssl_certificate /etc/letsencrypt/live/mydomain.com/fullchain.pem;
    ssl_certificate_key /etc/letsencrypt/live/mydomain.com/privkey.pem;

    ssl_session_timeout 5m;

    ssl_protocols SSLv3 TLSv1.2;
    ssl_ciphers "HIGH:!aNULL:!MD5 or HIGH:!aNULL:!MD5:!3DES";
    ssl_prefer_server_ciphers on;

	location / {
   		proxy_set_header X-Forwarded-For $proxy_add_x_forwarded_for;
    	proxy_set_header X-Forwarded-Proto $scheme;
   		proxy_set_header X-Real-IP $remote_addr;
   		proxy_set_header Host $http_host;
    	proxy_pass http://127.0.0.1:2368;
	}

    location ~ /.well-known {
        allow all;
    }

    client_max_body_size 50m;
}
Next, before we restart NGINX we should check the configs for errors using the -t flag.
# nginx -t
    nginx: the configuration file /etc/nginx/nginx.conf syntax is ok
    nginx: configuration file /etc/nginx/nginx.conf test is successful
If the test is successfully then restart NGINX else fix the issues reported
# service nginx restartGetting the A+
To get an A+ on the SSL Labs and others you need to enable HTTP Strict Transport Security or HSTS . This enables extra security which should prevent downgrade attacks and possible cookie hijacking. Something to bare in mind with this is that it will require all sub domains to have a certificate and could cause some issues when moving hosts. To enable this we just need to add a new header into our site, the easiest way to do this is by adding the add_header Strict-Transport-Security "max-age=31536000; includeSubDomains" always; line into our SSL site config above :
server {
	listen 443;
	server_name mydomain.com;
	root /var/www/ghost/system/nginx-root;


    ssl on;
    ssl_certificate /etc/letsencrypt/live/mydomain.com/fullchain.pem;
    ssl_certificate_key /etc/letsencrypt/live/mydomain.com/privkey.pem;

    ssl_session_timeout 5m;

    ssl_protocols SSLv3 TLSv1.2;
    ssl_ciphers "HIGH:!aNULL:!MD5 or HIGH:!aNULL:!MD5:!3DES";
    ssl_prefer_server_ciphers on;

	location / {
   		proxy_set_header X-Forwarded-For $proxy_add_x_forwarded_for;
    	proxy_set_header X-Forwarded-Proto $scheme;
   		proxy_set_header X-Real-IP $remote_addr;
   		proxy_set_header Host $http_host;
    	proxy_pass http://127.0.0.1:2368;
	}

    location ~ /.well-known {
        allow all;
    }

    client_max_body_size 50m;
    add_header Strict-Transport-Security "max-age=31536000; includeSubDomains" always;
}
Again test NGINX with -t flag and restart the service once everything checks out. If everything goes as planned then you can use https://www.ssllabs.com/ssltest/ to check your rating.
TLS v1.3
Although NGINX does support TLS 1.3 you will need a update to OpenSSL 1.1.1 to take advantage of it.

